打造具備 NLP 功能的 Telegram Bot(下)
上一篇文章已經讓 Chatbot 有了許多自然應答的功能,透過 OLAMI 預設的 IDS 對話模組也能處理多數詢問,但如果想要讓內容更多元,就需要仰賴內容供應商的資料來豐富對話內容,例如:希望它幫我找動漫歌曲,同時列出漂亮的專輯封面圖供選擇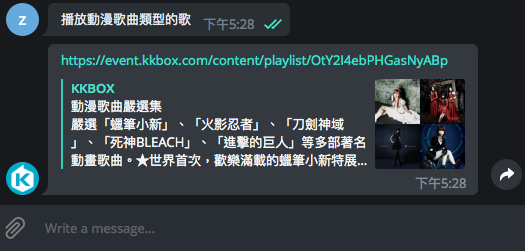
這一篇內容會介紹要怎麼整合更多內容進 Chatbot,同時也會介紹如何將 Chatbot 部署到 Heroku 上,正式在網路上提供服務給所有使用者~
使用的工具及服務:
-
Python 3(for develop)
-
pipenv(for dependency management)
-
OLAMI(for NLP)
-
KKBOX Open API(for third-party skill import)
-
ngrok(for testing)
-
Heroku(for deploying our chatbot)
Step 7. Add custom skill into chatbot
OLAMI NLI 系統提供方法,讓我們可以定義 Intent、符合該 Intent 的句型和句型中的 slot。舉例來說,我可以設定播放<keyword>類型的歌 的句型屬於 music_play_playlist Intent; <keyword> 則是句型中重要的 slot,讓 Chatbot 根據 <keyword> fetch 對應的 data 提供給使用者。音樂資料從 KKBOX Open API 取得,因為 KKBOX 日本歌曲比較多。API 裡面的 search method 提供搜尋功能,把音樂資料分為 track、album、artist、playlist 四種類型。可以根據這四種類型定義四種 Intent 與符合的句型,然後用句型中的 slot 作為 request KKBOX search API 的 query parameter,最後將搜尋結果回傳給使用者。
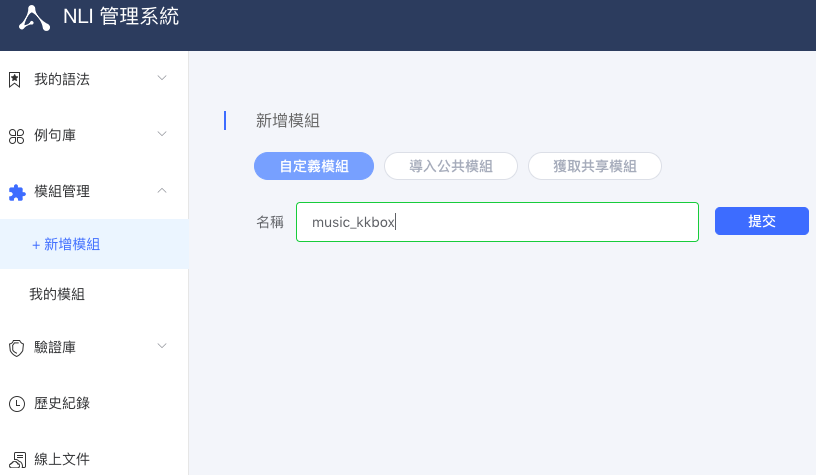
從 OLAMI 我的應用介面 => 進入 NLI 系統 => 新增模組 => 名稱命名:music_kkbox => 提交
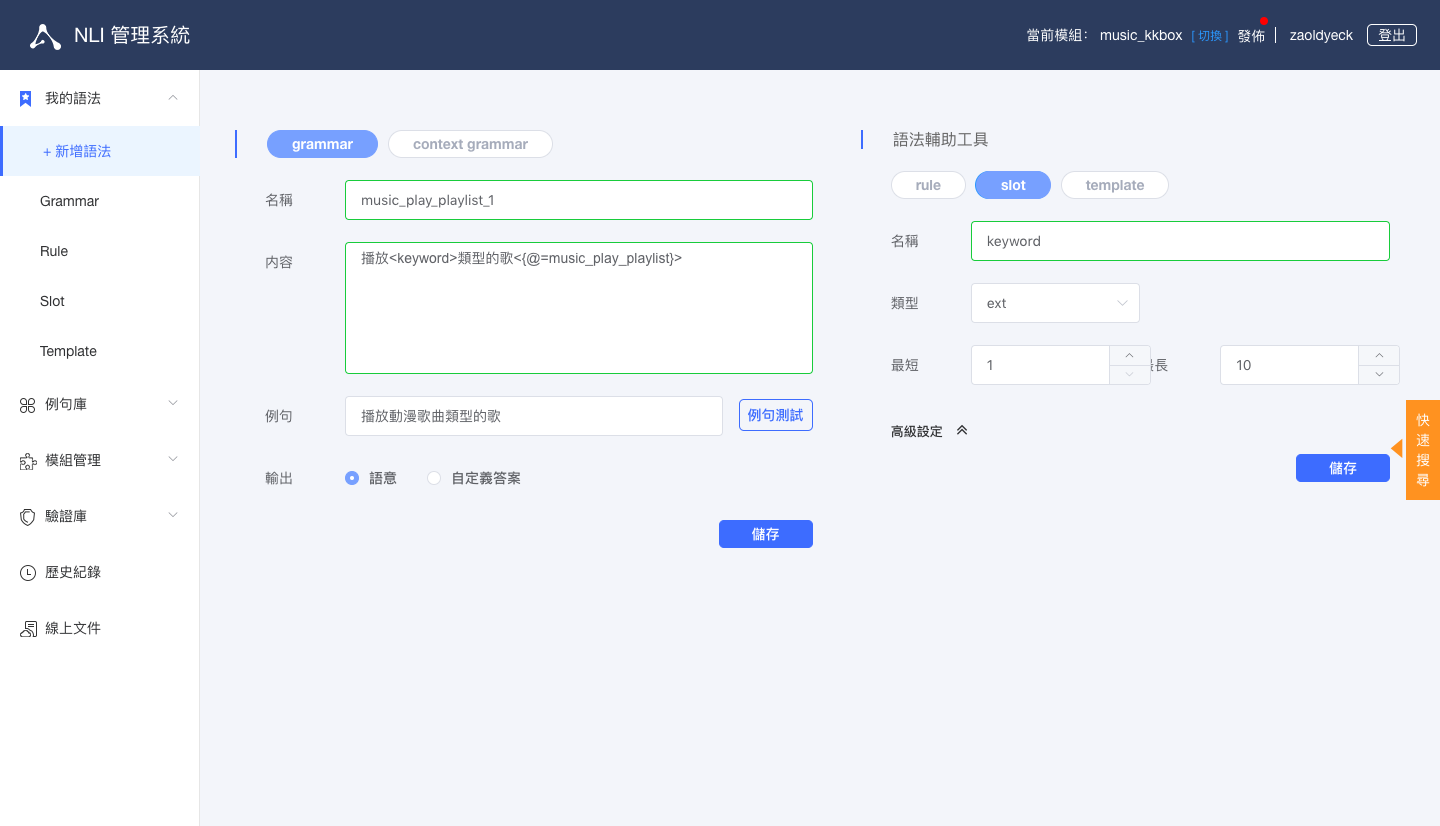
點選左側選單中的我的語法 => +新增語法
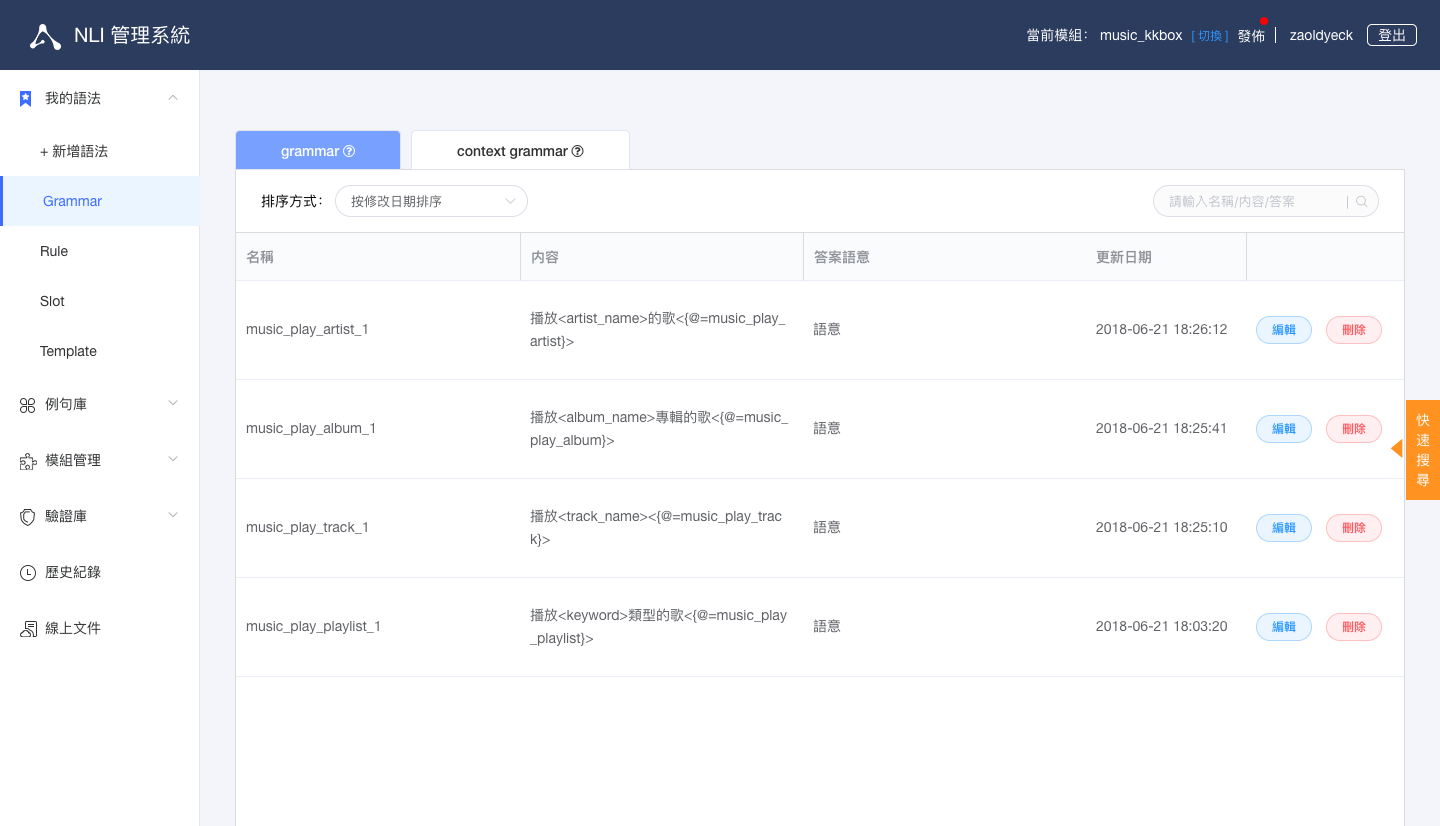
在這裡新增四種 Intent
-
music_play_track
-
music_play_album
-
music_play_artist
-
music_play_playlist
-
track_name
-
album_name
-
artist_name
-
keyword
-
播放<track_name><{@=music_play_track}>
-
播放<album_name>專輯的歌<{@=music_play_album}>
-
播放<artist_name>的歌<{@=music_play_artist}>
-
播放<keyword>類型的歌<{@=music_play_playlist}>
OSL(OLAMI Syntax Language) 語法教學文件完成後的結果
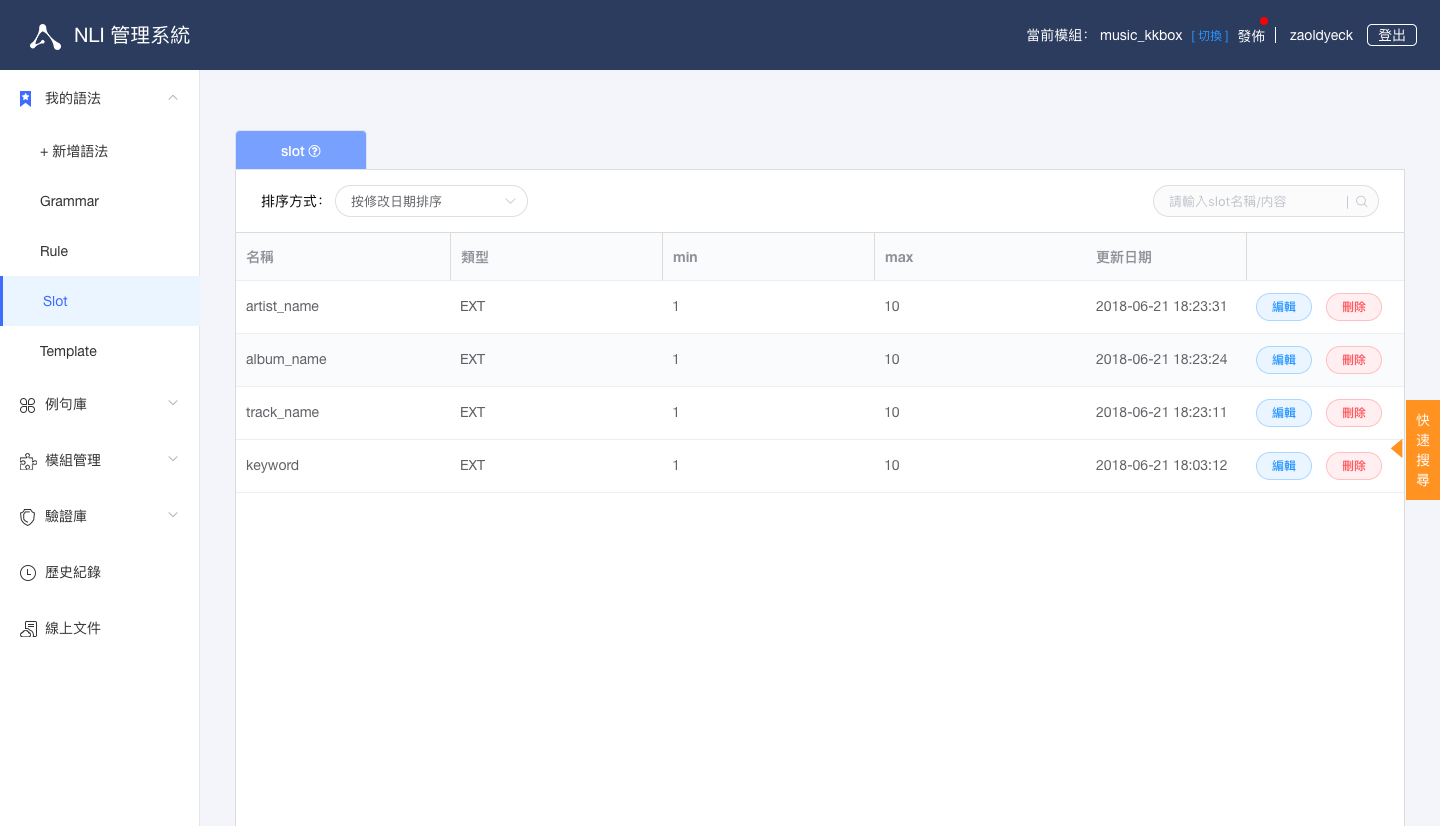
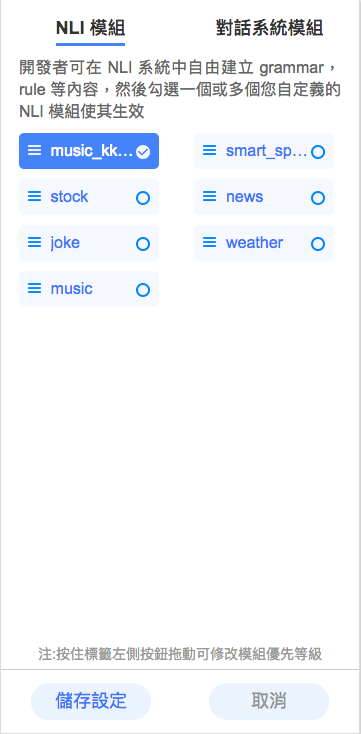
點選畫面右上角發佈 => 回到 OLAMI 我的應用介面 => 對 App 點選變更設定 => 將 NLI 模組 => music_kkbox 模組打勾 => 儲存設定
在 OLAMI 我的應用介面點選測試,測試語句打
播放動漫歌曲類型的歌,會得到 Response{
"nli":[
{
"desc_obj":{
"status":0
},
"semantic":[
{
"app":"music_kkbox",
"input":"播放動漫歌曲類型的歌",
"slots":[
{
"name":"keyword",
"value":"動漫歌曲"
}
],
"modifier":[
"music_play_playlist"
],
"customer":"59e031f7e4b0a8057efdce99"
}
],
"type":"music_kkbox"
}
]
}
type value 判斷「播放動漫歌曲類型的歌」這句話屬於 music_kkbox NLI 模組,再由 modifier 中的 element 暸解使用者的 Intent 是 music_play_playlist,最後用 slots 中的 keyword value 動漫歌曲 作為 request KKBOX Open API search method 的 query parameter,取得動漫歌曲的 playlist。先註冊 KKBOX Developer 帳號,在 My Apps 頁面 Create new app,得到 App ID 及 Secret,再把它們填入專案目錄中的
config.ini 檔案[KKBOX]
ID = your_app_id
SECRET = your_app_secret
api$ mkdir api
__init__.py 及 kkbox.py$ cd api
$ touch __init__.py
$ touch kkbox.py
Project Directory
├── api
|   ├── __init__.py
|   └── kkbox.py
├── nlp
|   ├── __init__.py
|   └── olami.py
├── config.ini
├── main.py
├── Pipfile
└── Pipfile.lock
__init__.py 是為了讓 olami.py import api 的時候認定 api 是一個 Module。編輯
api/__init__.pyfrom . import kkbox
import configparser
import logging

import requests

config = configparser.ConfigParser()
config.read('config.ini')

logger = logging.getLogger(__name__)


class KKBOX:
    AUTH_URL = 'https://account.kkbox.com/oauth2/token'
    API_BASE_URL = 'https://api.kkbox.com/v1.1/'

    def __init__(self, id=config['KKBOX']['ID'], secret=config['KKBOX']['SECRET']):
        self.id = id
        self.secret = secret
        self.token = self._get_token()

    def _get_token(self):
        response = requests.post(self.AUTH_URL, data={'grant_type': 'client_credentials'}, auth=(self.id, self.secret))
        response.raise_for_status()
        return response.json()['access_token']

    def search(self, type, q, territory='TW'):
        response = requests.get(self.API_BASE_URL + 'search', params={'type': type, 'q': q, 'territory': territory},
                                headers={'Authorization': 'Bearer ' + self.token})
        response.raise_for_status()
        response_json = response.json()
        result = {
            'artist': lambda: response_json['artists']['data'][0]['url'],
            'album': lambda: response_json['albums']['data'][0]['url'],
            'track': lambda: response_json['tracks']['data'][0]['url'],
            'playlist': lambda: response_json['playlists']['data'][0]['url']
        }[type]()
        return result
kkbox.py 實作了 KKBOX class init 時會利用 App ID 及 App Secret 走 Basic Authentication 取得 access_token。還有實作 request Search API method,根據期望的 type 及 q(keyword) 搜尋音樂資料,當搜尋有結果時,會 return 第一筆資料的 url。KKBOX Open API access token 取得方法可參考官方 Tutorial完成後,編輯
Search API 詳細說明文件
nlp/olami.py,我們要讓程式可以處理新的 music_kkbox Intent+from api.kkbox import KKBOX
class Olami:
def intent_detection(self, nli_obj):
+ def handle_music_kkbox_type(semantic):
+ type = semantic['modifier'][0].split('_')[2]
+ slots = semantic['slots']
+ kkbox = KKBOX()
+
+ def get_slot_value(key):
+ return next(filter(lambda el: el['name'] == key, slots))['value']
+
+ _reply = {
+ 'artist': lambda: kkbox.search(type, get_slot_value('artist_name')),
+ 'album': lambda: kkbox.search(type, get_slot_value('album_name')),
+ 'track': lambda: kkbox.search(type, get_slot_value('track_name')),
+ 'playlist': lambda: kkbox.search(type, get_slot_value('keyword'))
+ }[type]()
+ return _reply
type = nli_obj['type']
desc = nli_obj['desc_obj']
data = nli_obj.get('data_obj', [])
reply = {
'kkbox': lambda: data[0]['url'] if len(data) > 0 else desc['result'],
'baike': lambda: data[0]['description'],
'news': lambda: data[0]['detail'],
'joke': lambda: data[0]['content'],
'cooking': lambda: data[0]['content'],
'selection': lambda: handle_selection_type(desc['type']),
'ds': lambda: desc['result'] + '\n請用 /help 指令看看我能怎麼幫助您',
+ 'music_kkbox': lambda: handle_music_kkbox_type(nli_obj['semantic'][0])
}.get(type, lambda: desc['result'])()
return reply
import configparser
import json
import logging
import time
from hashlib import md5
from api.kkbox import KKBOX
import requests
config = configparser.ConfigParser()
config.read('config.ini')
logger = logging.getLogger(__name__)
class NliStatusError(Exception):
"""The NLI result status is not 'ok'"""
class Olami:
URL = 'https://tw.olami.ai/cloudservice/api'
def __init__(self, app_key=config['OLAMI']['APP_KEY'], app_secret=config['OLAMI']['APP_SECRET'], input_type=1):
self.app_key = app_key
self.app_secret = app_secret
self.input_type = input_type
def nli(self, text, cusid=None):
response = requests.post(self.URL, params=self._gen_parameters('nli', text, cusid))
response.raise_for_status()
response_json = response.json()
if response_json['status'] != 'ok':
raise NliStatusError(
"NLI responded status != 'ok': {}".format(response_json['status']))
else:
nli_obj = response_json['data']['nli'][0]
return self.intent_detection(nli_obj)
def _gen_parameters(self, api, text, cusid):
timestamp_ms = (int(time.time() * 1000))
params = {'appkey': self.app_key,
'api': api,
'timestamp': timestamp_ms,
'sign': self._gen_sign(api, timestamp_ms),
'rq': self._gen_rq(text)}
if cusid is not None:
params.update(cusid=cusid)
return params
def _gen_sign(self, api, timestamp_ms):
data = self.app_secret + 'api=' + api + 'appkey=' + self.app_key + \
'timestamp=' + str(timestamp_ms) + self.app_secret
return md5(data.encode('ascii')).hexdigest()
def _gen_rq(self, text):
obj = {'data_type': 'stt', 'data': {'input_type': self.input_type, 'text': text}}
return json.dumps(obj)
def intent_detection(self, nli_obj):
def handle_selection_type(type):
reply = {
'news': lambda: desc['result'] + '\n\n' + '\n'.join(
str(index + 1) + '. ' + el['title'] for index, el in enumerate(data)),
'poem': lambda: desc['result'] + '\n\n' + '\n'.join(
str(index + 1) + '. ' + el['poem_name'] + ',作者:' + el['author'] for index, el in
enumerate(data)),
'cooking': lambda: desc['result'] + '\n\n' + '\n'.join(
str(index + 1) + '. ' + el['name'] for index, el in
enumerate(data))
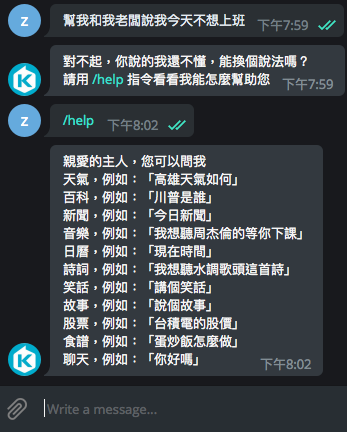
}.get(type, lambda: '對不起,你說的我還不懂,能換個說法嗎?')()
return reply
def handle_music_kkbox_type(semantic):
type = semantic['modifier'][0].split('_')[2]
slots = semantic['slots']
kkbox = KKBOX()
def get_slot_value(key):
return next(filter(lambda el: el['name'] == key, slots))['value']
_reply = {
'artist': lambda: kkbox.search(type, get_slot_value('artist_name')),
'album': lambda: kkbox.search(type, get_slot_value('album_name')),
'track': lambda: kkbox.search(type, get_slot_value('track_name')),
'playlist': lambda: kkbox.search(type, get_slot_value('keyword'))
}[type]()
return _reply
type = nli_obj['type']
desc = nli_obj['desc_obj']
data = nli_obj.get('data_obj', [])
reply = {
'kkbox': lambda: data[0]['url'] if len(data) > 0 else desc['result'],
'baike': lambda: data[0]['description'],
'news': lambda: data[0]['detail'],
'joke': lambda: data[0]['content'],
'cooking': lambda: data[0]['content'],
'selection': lambda: handle_selection_type(desc['type']),
'ds': lambda: desc['result'] + '\n請用 /help 指令看看我能怎麼幫助您',
'music_kkbox': lambda: handle_music_kkbox_type(nli_obj['semantic'][0])
}.get(type, lambda: desc['result'])()
return reply
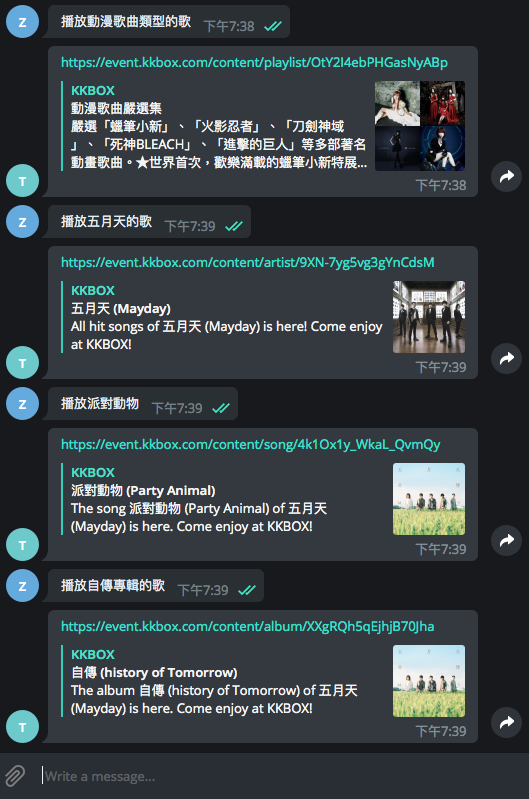
Yeah~ Chatbot 有新的 Music-KKBOX 技能了!如果手機有裝 KKBOX App,從手機點選連結就會啟動 KKBOX App 播放歌曲。
Step 8. User-friendly chatbot design
還有幾個讓 Chatbot 變得更佳 user-friendly 的方法,分享給大家。- Welcome message
- Reply keyboard markup
- Help message
- Error handling
實作,編輯
main.py+from telegram import ReplyKeyboardMarkup
+from telegram.ext import Dispatcher, CommandHandler, MessageHandler, Filters
+
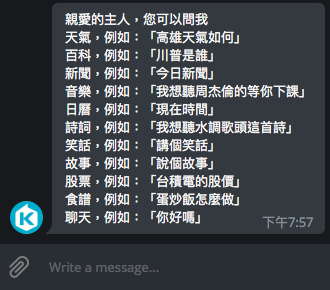
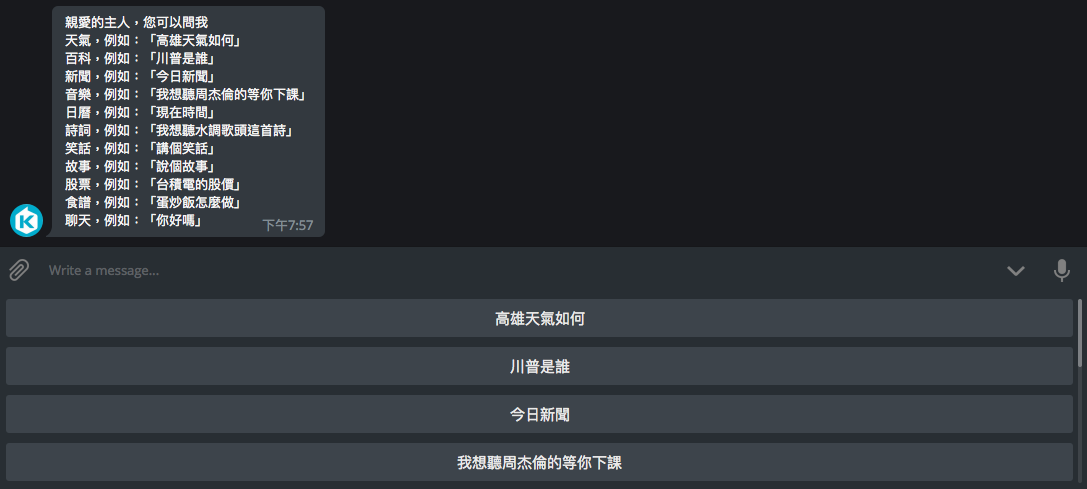
+welcome_message = '親愛的主人,您可以問我\n' \
+ '天氣,例如:「高雄天氣如何」\n' \
+ '百科,例如:「川普是誰」\n' \
+ '新聞,例如:「今日新聞」\n' \
+ '音樂,例如:「我想聽周杰倫的等你下課」\n' \
+ '日曆,例如:「現在時間」\n' \
+ '詩詞,例如:「我想聽水調歌頭這首詩」\n' \
+ '笑話,例如:「講個笑話」\n' \
+ '故事,例如:「說個故事」\n' \
+ '股票,例如:「台積電的股價」\n' \
+ '食譜,例如:「蛋炒飯怎麼做」\n' \
+ '聊天,例如:「你好嗎」'
+reply_keyboard_markup = ReplyKeyboardMarkup([['高雄天氣如何'],
+ ['川普是誰'],
+ ['今日新聞'],
+ ['我想聽周杰倫的等你下課'],
+ ['現在時間'],
+ ['我想聽水調歌頭這首詩'],
+ ['講個笑話'],
+ ['說個故事'],
+ ['台積電的股價'],
+ ['蛋炒飯怎麼做'],
+ ['你好嗎']])
+def start_handler(bot, update):
+ """Send a message when the command /start is issued."""
+ update.message.reply_text(welcome_message, reply_markup=reply_keyboard_markup)
+
+
+def help_handler(bot, update):
+ """Send a message when the command /help is issued."""
+ update.message.reply_text(welcome_message, reply_markup=reply_keyboard_markup)
+
+
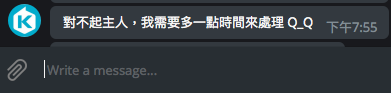
+def error_handler(bot, update, error):
+ """Log Errors caused by Updates."""
+ logger.error('Update "%s" caused error "%s"', update, error)
+ update.message.reply_text('對不起主人,我需要多一點時間來處理 Q_Q')
+dispatcher.add_handler(CommandHandler('start', start_handler))
+dispatcher.add_handler(CommandHandler('help', help_handler))
+dispatcher.add_error_handler(error_handler)
main.pyimport configparser
import logging
import telegram
from flask import Flask, request
from telegram import ReplyKeyboardMarkup
from telegram.ext import Dispatcher, CommandHandler, MessageHandler, Filters
from nlp.olami import Olami
# Load data from config.ini file
config = configparser.ConfigParser()
config.read('config.ini')
# Enable logging
logging.basicConfig(format='%(asctime)s - %(name)s - %(levelname)s - %(message)s',
level=logging.INFO)
logger = logging.getLogger(__name__)
# Initial Flask app
app = Flask(__name__)
# Initial bot by Telegram access token
bot = telegram.Bot(token=(config['TELEGRAM']['ACCESS_TOKEN']))
welcome_message = '親愛的主人,您可以問我\n' \
'天氣,例如:「高雄天氣如何」\n' \
'百科,例如:「川普是誰」\n' \
'新聞,例如:「今日新聞」\n' \
'音樂,例如:「我想聽周杰倫的等你下課」\n' \
'日曆,例如:「現在時間」\n' \
'詩詞,例如:「我想聽水調歌頭這首詩」\n' \
'笑話,例如:「講個笑話」\n' \
'故事,例如:「說個故事」\n' \
'股票,例如:「台積電的股價」\n' \
'食譜,例如:「蛋炒飯怎麼做」\n' \
'聊天,例如:「你好嗎」'
reply_keyboard_markup = ReplyKeyboardMarkup([['高雄天氣如何'],
['川普是誰'],
['今日新聞'],
['我想聽周杰倫的等你下課'],
['現在時間'],
['我想聽水調歌頭這首詩'],
['講個笑話'],
['說個故事'],
['台積電的股價'],
['蛋炒飯怎麼做'],
['你好嗎']])
@app.route('/hook', methods=['POST'])
def webhook_handler():
"""Set route /hook with POST method will trigger this method."""
if request.method == "POST":
update = telegram.Update.de_json(request.get_json(force=True), bot)
dispatcher.process_update(update)
return 'ok'
def start_handler(bot, update):
"""Send a message when the command /start is issued."""
update.message.reply_text(welcome_message, reply_markup=reply_keyboard_markup)
def help_handler(bot, update):
"""Send a message when the command /help is issued."""
update.message.reply_text(welcome_message, reply_markup=reply_keyboard_markup)
def reply_handler(bot, update):
"""Reply message."""
text = update.message.text
reply = Olami().nli(text)
update.message.reply_text(reply)
def error_handler(bot, update, error):
"""Log Errors caused by Updates."""
logger.error('Update "%s" caused error "%s"', update, error)
update.message.reply_text('對不起主人,我需要多一點時間來處理 Q_Q')
# New a dispatcher for bot
dispatcher = Dispatcher(bot, None)
# Add handler for handling message, there are many kinds of message. For this handler, it particular handle text
# message.
dispatcher.add_handler(MessageHandler(Filters.text, reply_handler))
dispatcher.add_handler(CommandHandler('start', start_handler))
dispatcher.add_handler(CommandHandler('help', help_handler))
dispatcher.add_error_handler(error_handler)
if __name__ == "__main__":
# Running server
app.run(debug=True)
Last Step - Deployment
最後,我們要把 Chatbot web server 程式 deploy 到 production 環境上。選擇的是 Heroku,它的 Free pricing 方案不用綁定信用卡就可以使用,部署方法也相當簡單。確認已經有註冊 Heroku Account,而且電腦有安裝 Heroku CLI。進入 Heroku Dashboard,Create new app
回到專案目錄,新增
Procfile 檔,編輯成如下web: gunicorn main:app --log-file -
web process,用 gunicorn 部署 main module 中的 Flask App。Procfile 說明文件完成後的專案目錄結構
Gunicorn 官網
Project Directory
├── api
|   ├── __init__.py
|   └── kkbox.py
├── nlp
|   ├── __init__.py
|   └── olami.py
├── config.ini
├── main.py
├── Pipfile
├── Pipfile.lock
└── Procfile
$ git init
$ git checkout -b production
$ git add .
$ git commit -m "Deploying to Heroku"
$ heroku login
$ heroku git:remote -a {your_heroku_app_name}
$ git push heroku production:master
https://{$your_heroku_app_name}.herokuapp.com/
https://kkbox-telegram-bot.herokuapp.com/
https://api.telegram.org/bot{$token}/setWebhook?url={$webhook_url}
$token 和 $webhook_url 請換成你在 Step 1 中申請到的,例如:https://api.telegram.org/bot606248605:AAGv_TOJdNNMc_v3toHK_X6M-dev_1tG-JA/setWebhook?url=https://kkbox-telegram-bot.herokuapp.com/hook
Getting Started on Heroku with Python Document
如果要將專案 push 到 GitHub,先 checkout 回 master branch、新增 .gitignore 檔案,ignore config.ini(因為裡面有 credential 資訊),再進行後續動作
總結
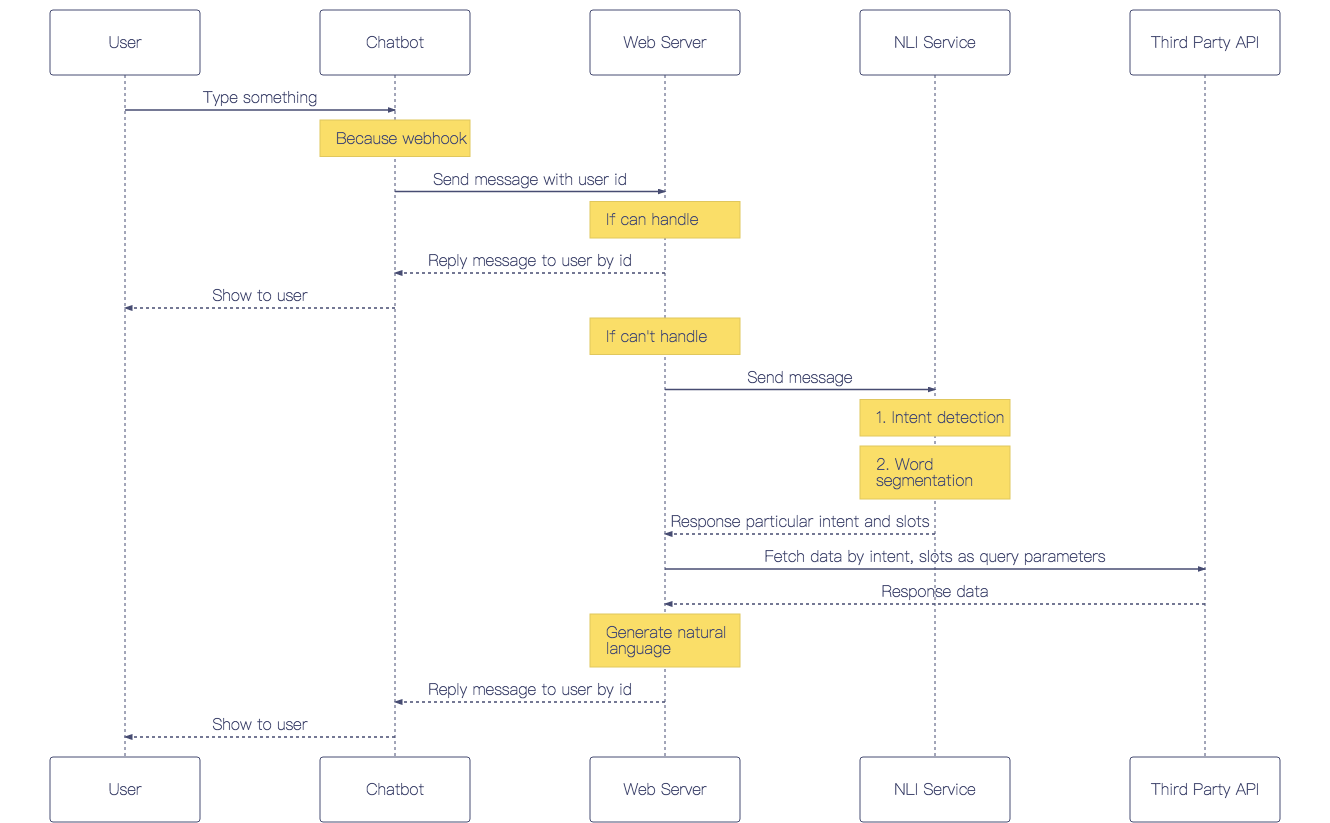
用上下兩篇文章介紹如何打造具備 NLP 功能的 Telegram Bot,共 9 個步驟實作上圖 Chatbot 流程中的每個環節,包含導入 NLP service、Intent detection、Add custom skill、優化使用者體驗等。
完整程式碼放在 GitHub repository,按照 README 的步驟,就可以 deploy 和範例具備一樣技能的 Telegram Bot,歡迎 pull request。
回到第一篇文章
留言