近期因為疫情的關係,越來越多企業開始實施分流或在家工作,視訊會議的需求也日益增加。
在商用解決方案選擇上,有不少企業會選擇知名品牌的產品,例如 Cisco Webex、Google Meet、Microsoft Teams、Zoom 都是很不錯的方案。
KKBOX 集團在去年便試行及做好充分 work from home 的準備,今年五月也因應疫情升溫,全員 work from home 至今兩個月有餘。
當然,取之 Open Source,也要對社群有些貢獻。在這一屆 COSCUP,我們要來介紹 Open Source 圈中也很知名,效果也很不錯的一套視訊會議平台:Jitsi。
除了基本的視訊會議功能外,在最後我們也會示範如何透過 Jitsi 畫面輸出到 YouTube/Twitch 或其他支援 RTMP 的平台進行直播。
由於篇幅有限,且 Jitsi 可以調整的細節非常多。今天我們純粹很快速的示範,如何簡單的建置出一個 Jitsi 環境,並提供單場會議內容錄影或直播。
Jitsi 的文件可以在這裡找到。
今天透過 AWS Lightsail 的 $10/month instance(1 core CPU + 2GB RAM + 60GB SSD),作業系統則是 Ubuntu 20.04 來示範。當然,使用其他 VPS 亦可,大同小異,這邊直接跳過 VPS 相關的建置過程。
*firewall 相關資料參考這裡及這裡。
針對系統做必要的更新
基本的 apt repository 更新:
$ sudo apt update
因為後面要示範的會議錄影及直播需要使用 ALSA loopback device,如果是 EC2 or Lightsail 則需要額外安裝 generic kernel(註):
$ sudo apt install linux-image-generic linux-headers-generic linux-image-extra-virtual
接著做系統套件們的更新:
$ sudo apt dist-upgrade
$ sudo apt autoremove
如果是 AWS EC2 or Lightsail 則需要另外再將預設的 AWS optimized kernel 移除(註):
$ sudo apt remove linux-image-aws linux-aws-* linux-image-*-aws
最後將 snd-aloop module 設為開機自動載入,重開機:
$ sudo sh -c "echo 'snd-aloop' >> /etc/modules"
$ sudo reboot
註:可以參考這裡*
接著將 Jitsi 官方的 apt repository 與 gpg key 加進來,並安裝 jitsi-meet:
$ sudo sh -c "echo 'deb https://download.jitsi.org unstable/' > /etc/apt/sources.list.d/jitsi-unstable.list"
$ wget -qO - https://download.jitsi.org/jitsi-key.gpg.key | sudo apt-key add -
$ sudo apt update
$ sudo apt install jitsi-meet
過程中會提示輸入 server hostname,在這裡我們輸入 coscup.kk.stream(請自行替換這個 hostname 為你自己的 hostname)。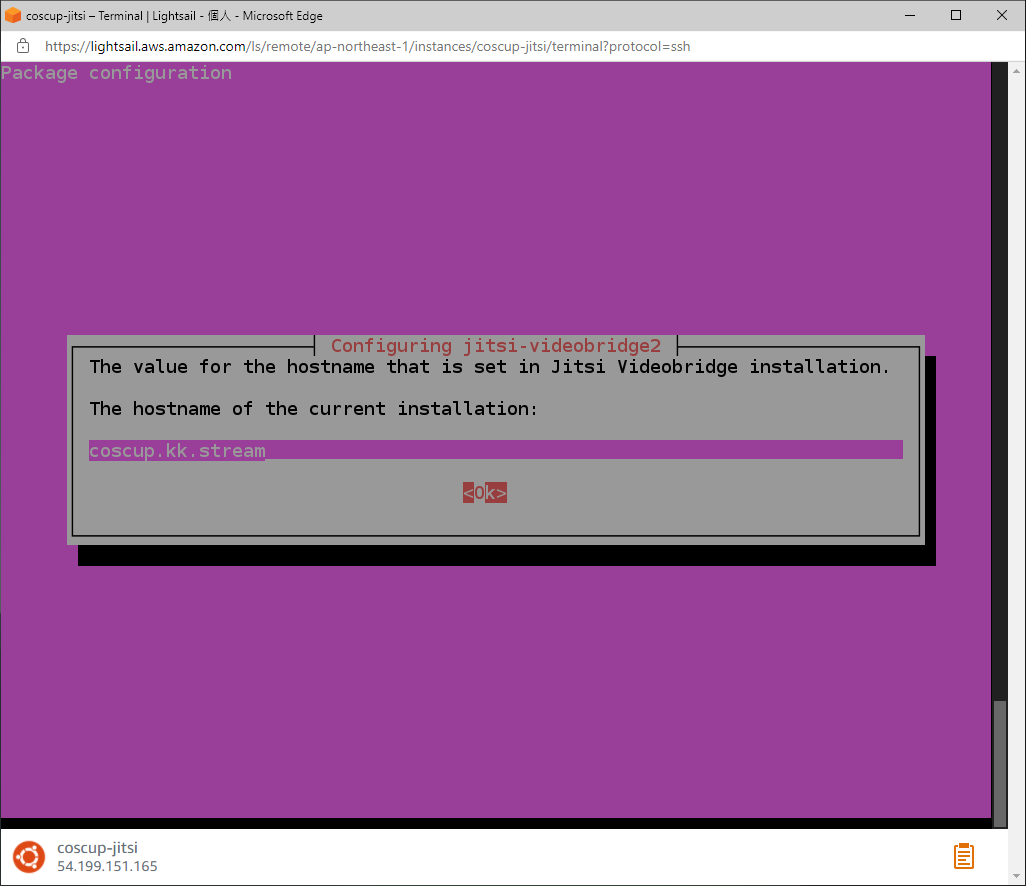
在安裝過程時先選擇自己簽發憑證(self-signed)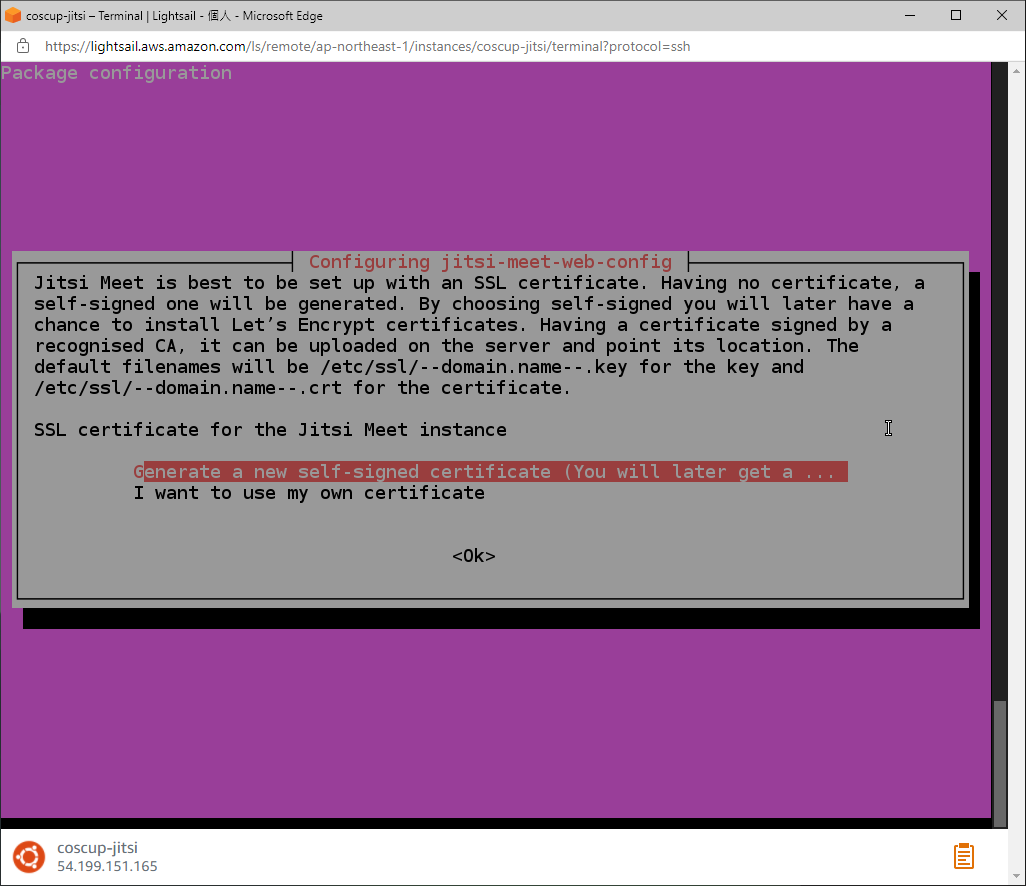
後面再透過 Let’s Encrypt 簽發真正可用的憑證或自行替換購買的憑證:
$ sudo /usr/share/jitsi-meet/scripts/install-letsencrypt-cert.sh
接下來參考這裡相關的說明,開始調整 Jitsi 設定。
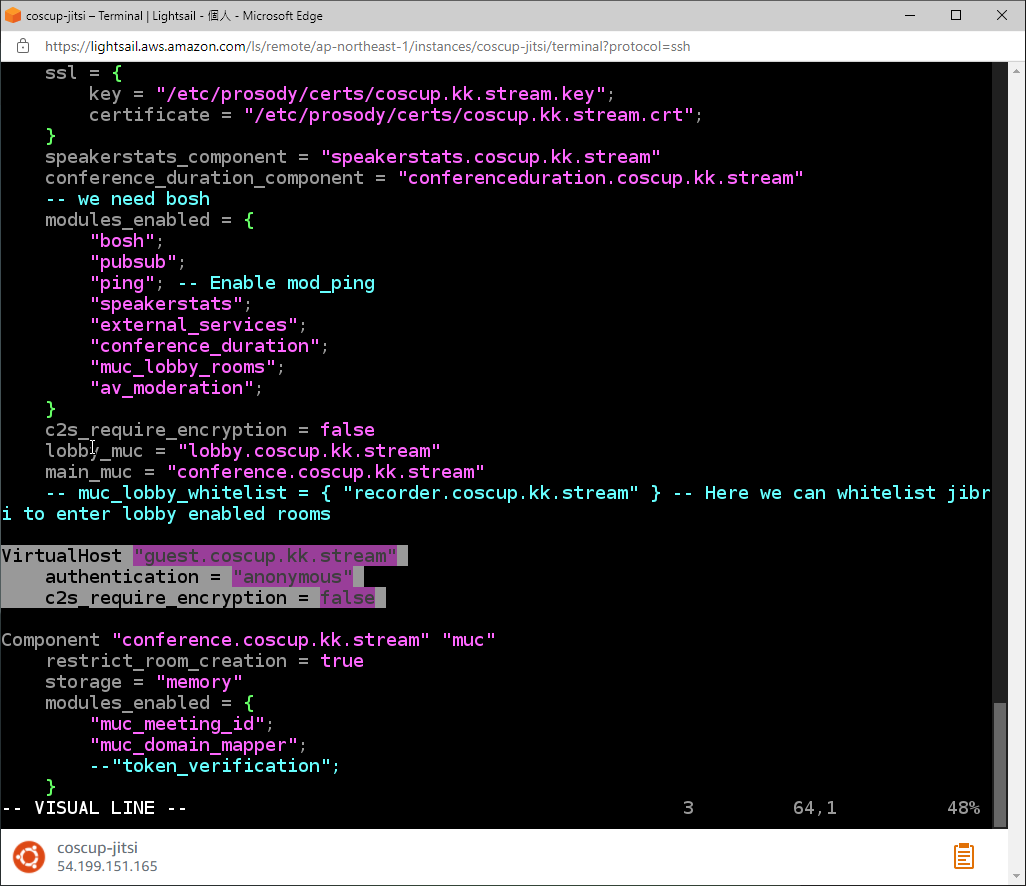
調整 Prosody 的設定:
$ sudo vim /etc/prosody/conf.d/coscup.kk.stream.cfg.lua
找到 VirtualHost "coscup.kk.stream" 這一段,將裡面的 authentication = "anonymous" 改成 authentication = "internal_hashed"(關閉匿名使用模式,使用簡單帳號管理機制)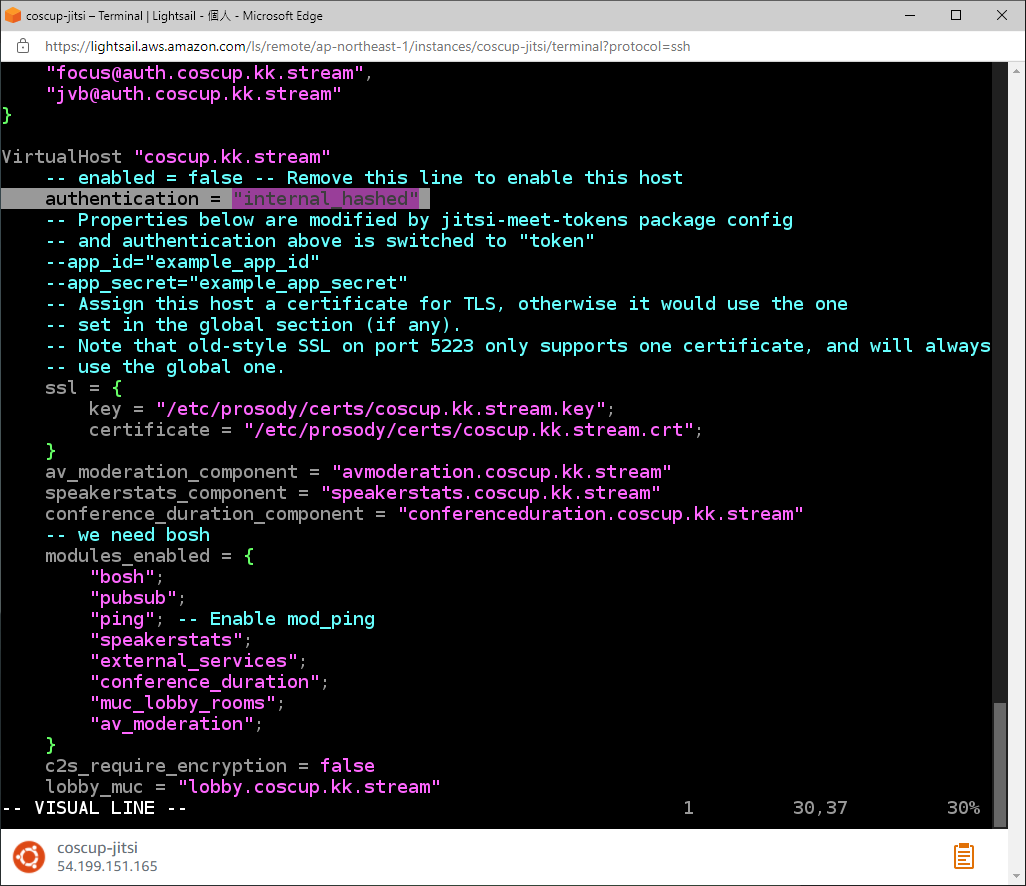
接著在 VirtualHost "coscup.kk.stream" 這一段的後面加上:
VirtualHost "guest.coscup.kk.stream"
    authentication = "anonymous"
    c2s_require_encryption = false
調整 jitsi-meet 的設定:
$ sudo vim /etc/jitsi/meet/coscup.kk.stream-config.js
找到 hosts 的區段,加上 anonymous domain 設定 anonymousdomain: 'guest.coscup.kk.stream',
調整 jicofo 設定:
$ sudo sh -c "echo 'org.jitsi.jicofo.auth.URL=XMPP:coscup.kk.stream' >> /etc/jitsi/jicofo/sip-communicator.properties"
建立一個接下來會用到的 Jitsi 管理者帳號:
$ sudo prosodyctl register <帳號名稱> coscup.kk.stream <密碼>
# 例如 sudo prosodyctl register coscup coscup.kk.stream ilovecoscup
錄影需求,接下來安裝 Jibri 與 FFmpeg 與 Google Chrome 與 Chromedriver
$ sudo apt install jibri ffmpeg
$ wget -qO - https://dl-ssl.google.com/linux/linux_signing_key.pub | sudo apt-key add -
$ sudo sh -c "echo 'deb http://dl.google.com/linux/chrome/deb/ stable main' > /etc/apt/sources.list.d/google-chrome.list"
$ sudo apt update
$ sudo apt install google-chrome-stable
$ sudo mkdir -p /etc/opt/chrome/policies/managed
$ sudo sh -c "echo '{ "CommandLineFlagSecurityWarningsEnabled": false }' >>/etc/opt/chrome/policies/managed/managed_policies.json"
$ CHROME_DRIVER_VERSION=`curl -sS chromedriver.storage.googleapis.com/LATEST_RELEASE`
$ wget -N http://chromedriver.storage.googleapis.com/$CHROME_DRIVER_VERSION/chromedriver_linux64.zip -P ~/
$ unzip ~/chromedriver_linux64.zip -d ~/
$ rm ~/chromedriver_linux64.zip
$ sudo mv -f ~/chromedriver /usr/local/bin/chromedriver
$ sudo chown root:root /usr/local/bin/chromedriver
$ sudo chmod 0755 /usr/local/bin/chromedriver
$ sudo apt install default-jre-headless curl alsa-utils icewm xdotool xserver-xorg-input-void xserver-xorg-video-dummy
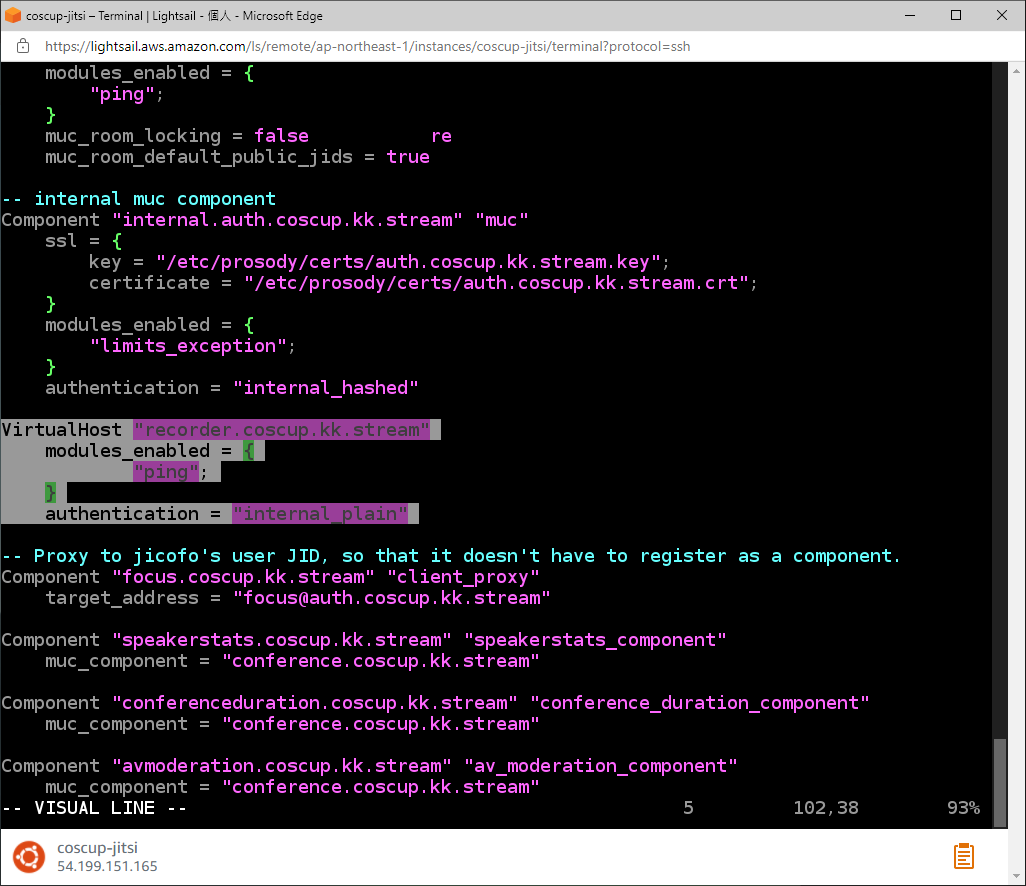
加上 Prosody 錄影相關的 vhost:
$ sudo vim /etc/prosody/conf.d/coscup.kk.stream.cfg.lua
加上這一段
VirtualHost "recorder.coscup.kk.stream"
    modules_enabled = {
        "ping";
    }
    authentication = "internal_plain"
建立兩個帳號給 jibri(密碼自行替換):
$ sudo prosodyctl register jibri auth.coscup.kk.stream jibriauthpass
$ sudo prosodyctl register recorder recorder.coscup.kk.stream jibrirecorderpass
調整 jicofo 的 jibri BREWERY 及 PENDING_TIMEOUT 及 SHORT_ID 參數:
$ sudo sh -c "echo 'org.jitsi.jicofo.jibri.BREWERY=JibriBrewery@internal.auth.coscup.kk.stream' >> /etc/jitsi/jicofo/sip-communicator.properties"
$ sudo sh -c "echo 'org.jitsi.jicofo.jibri.PENDING_TIMEOUT=90' >> /etc/jitsi/jicofo/sip-communicator.properties"
$ sudo sh -c "echo 'org.jitsi.jicofo.SHORT_ID=1' >> /etc/jitsi/jicofo/sip-communicator.properties"
最後開啟 Jitsi 的錄影及 live 功能:
$ sudo vim /etc/jitsi/meet/coscup.kk.stream-config.js
在 testing 區段找到相關地方調整成
        fileRecordingsEnabled: true,
        liveStreamingEnabled: true,
        hiddenDomain: 'recorder.coscup.kk.stream',
加上 jibri 設定:
$ sudo vim /etc/jitsi/jibri/jibri.conf
置換成這樣(其中 jibri 及 recorder 這兩個帳號的密碼要跟早先建立的相同)
jibri {
  id = "coscup.kk.stream-1"
  single-use-mode = false
  api {
    http {
      external-api-port = 2222
      internal-api-port = 3333
    }
    xmpp {
      environments = [{
        name = "COSCUP Jitsi Demo"
        xmpp-server-hosts = ["coscup.kk.stream"]
        xmpp-domain = "coscup.kk.stream"
        control-login = {
          domain = "auth.coscup.kk.stream"
          username = "jibri"
          password = "jibriauthpass"
        }
        control-muc = {
          domain = "internal.auth.coscup.kk.stream"
          room-name = "JibriBrewery"
          nickname = "jibri-nickname"
        }
        call-login = {
          domain = "recorder.coscup.kk.stream"
          username = "recorder"
          password = "jibrirecorderpass"
        }
        strip-from-room-domain = "conference."
        usage-timeout = 3 hour
        trust-all-xmpp-certs = true
      }]
    }
  }
  recording {
    recordings-directory = "/srv/recordings"
    finalize-script = ""
  }
  streaming {
    rtmp-allow-list = [
      ".*"
    ]
  }
  ffmpeg {
    resolution = "1920x1080"
    audio-source = "alsa"
    audio-device = "plug:bsnoop"
  }
  chrome {
    flags = [
      "--use-fake-ui-for-media-stream",
      "--start-maximized",
      "--kiosk",
      "--enabled",
      "--disable-infobars",
      "--autoplay-policy=no-user-gesture-required"
    ]
  }
  stats {
    enable-stats-d = true
  }
  webhook {
    subscribers = []
  }
  call-status-checks {
    no-media-timeout = 30 seconds
    all-muted-timeout = 10 minutes
    default-call-empty-timeout = 30 seconds
  }
}
建立錄影用的目錄:
$ sudo mkdir /srv/recordings
$ sudo chown jibri:jibri /srv/recordings
將 jibri 加入存取 video/audio 相關 device 的系統群組:
$ sudo usermod -aG adm,audio,video,plugdev jibri
讓 jibri 開機就跑起來:
$ sudo systemctl enable jibri
重開機,大功告成
$ sudo reboot
接著就能直接以瀏覽器打開 Jitsi,並且可以建立新的會議室: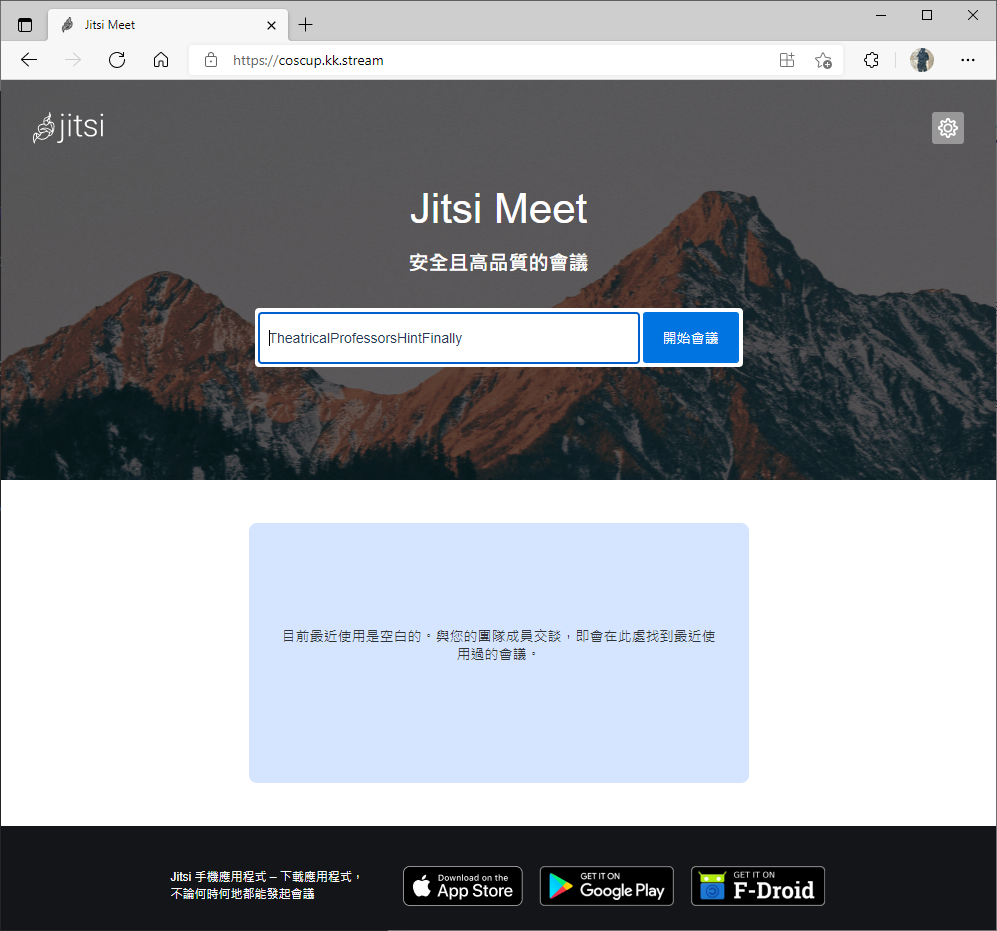
如果主持人尚未加入,請等待主持人。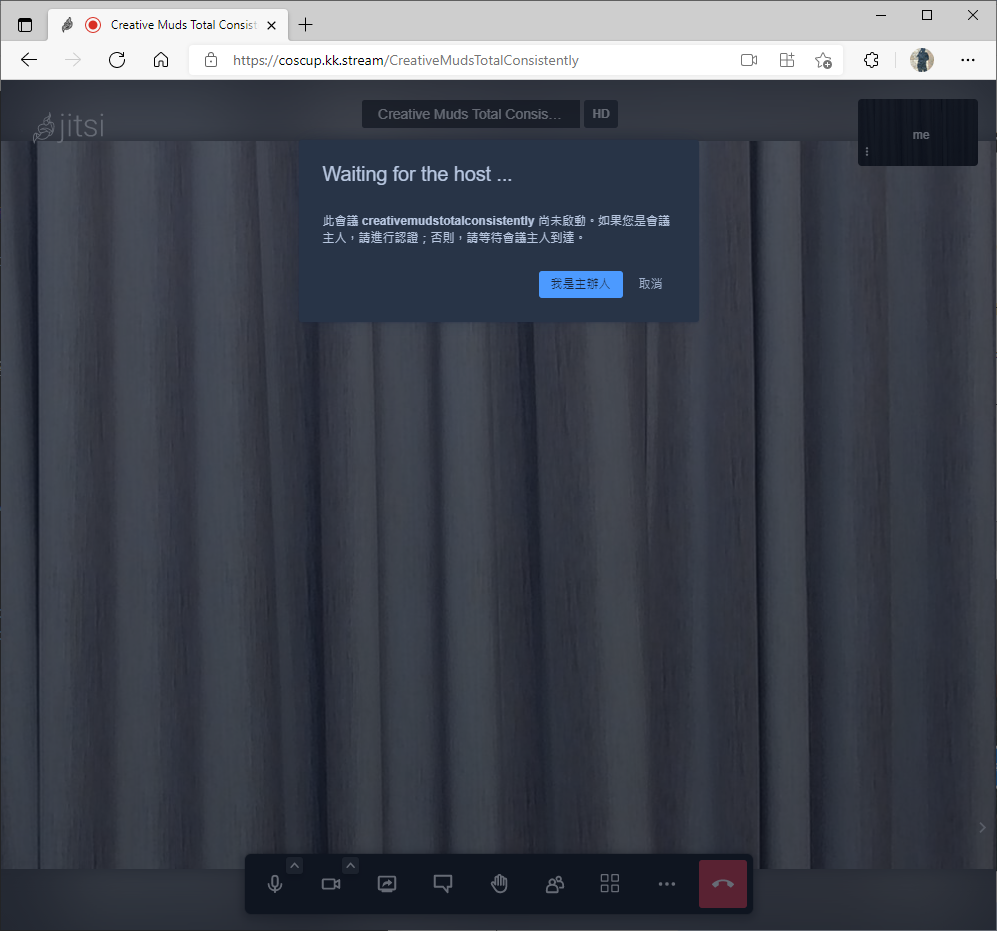
如果你就是主持人,則輸入稍早建立的管理者帳號密碼: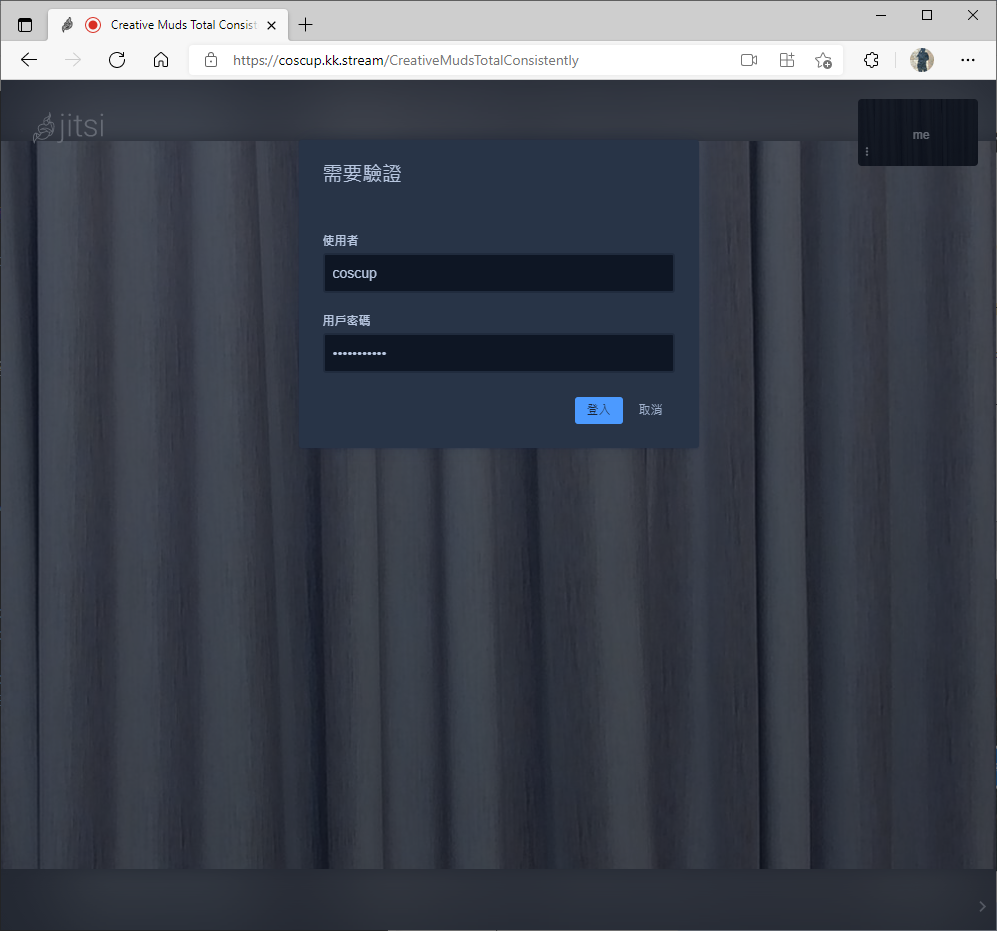
接著就可以邀請大家加入會議啦: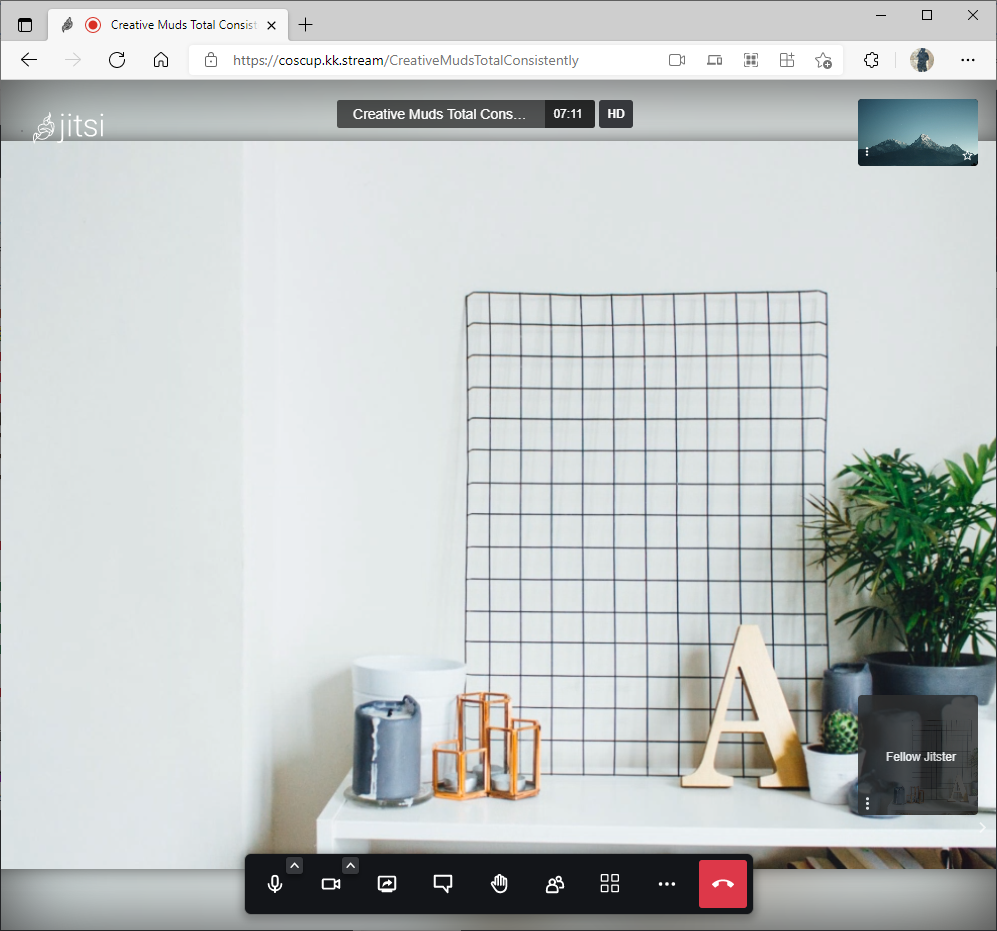
也可以建立這場會議的錄影或將其透過 RTMP 往其他直播平台輸出: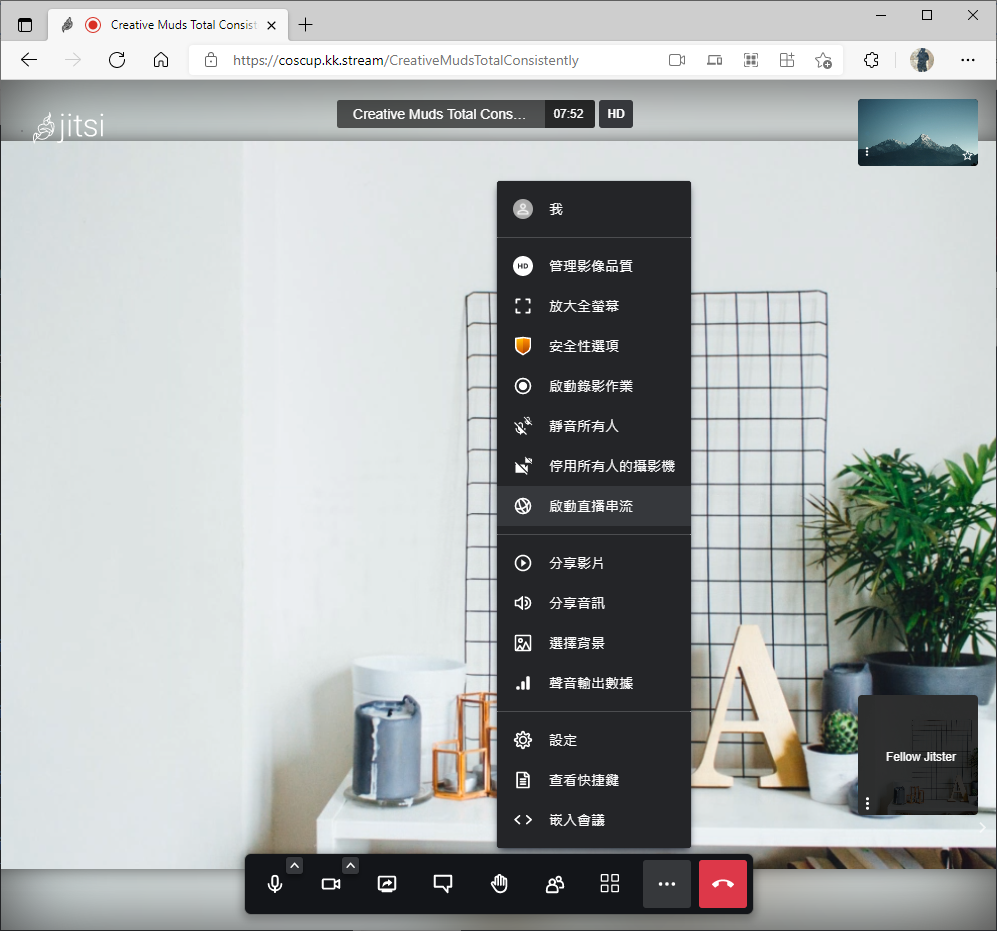

留言